Now that you have your WordPress website or Blog launched and up running, of course, you want to keep it fresh with new posts and other activities you created the website to promote in first place. This is a very easy thing as long as you know how to use the computer and Word editing programs. Note, this may look different depending on the customization you or your designer/ web developer has made to the WordPress CMS (Content Management System). So let’s get to the task now…
To create a WordPress post, you need to login your CMS or WordPress Administration dashboard. To do this, you need your “Admin” username and password, which you created when you or your designer/ developer installed your system. So get those credentials.
1- Login your Admin with your Username or Email Address and Password
Once you successfully login, Look for your website title at the top left and hover on it. You should see “Dashboard”. Click on “Dashboard”
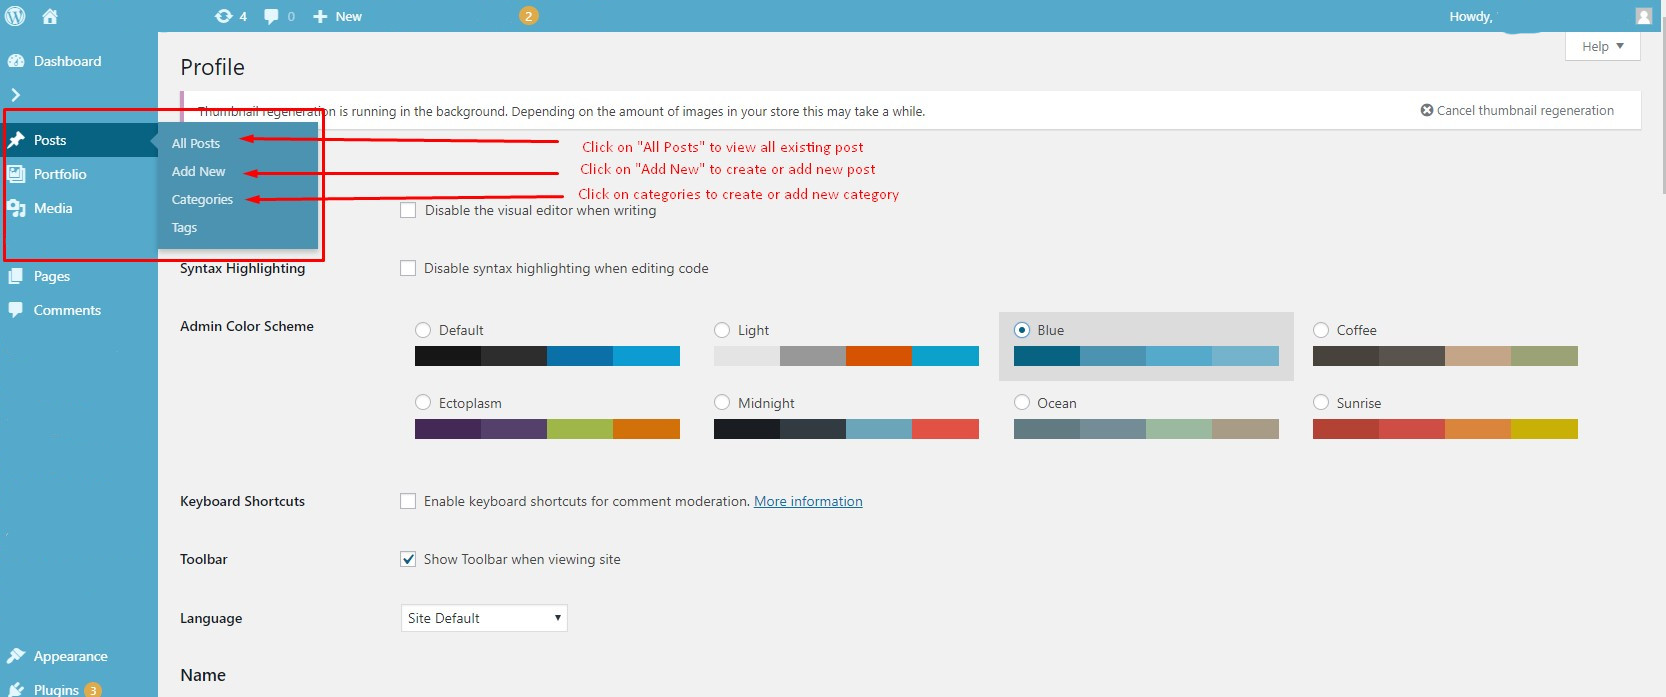
2- Once in your website’s Admin or Backoffice, locate or look for the “Posts” or the name that has been customized to by your designer/ developer, “Blogging, Post News” …etc. This is usually on your top left, and hover on it.
When you hover on “Posts” you should see the submenus: “All Posts, Add New, Categories, Tags”. Click on “Add New”
3- Click on “Add New”. Note that Add New Posts page can also be found from the + New link in the WordPress Admin Bar, also.
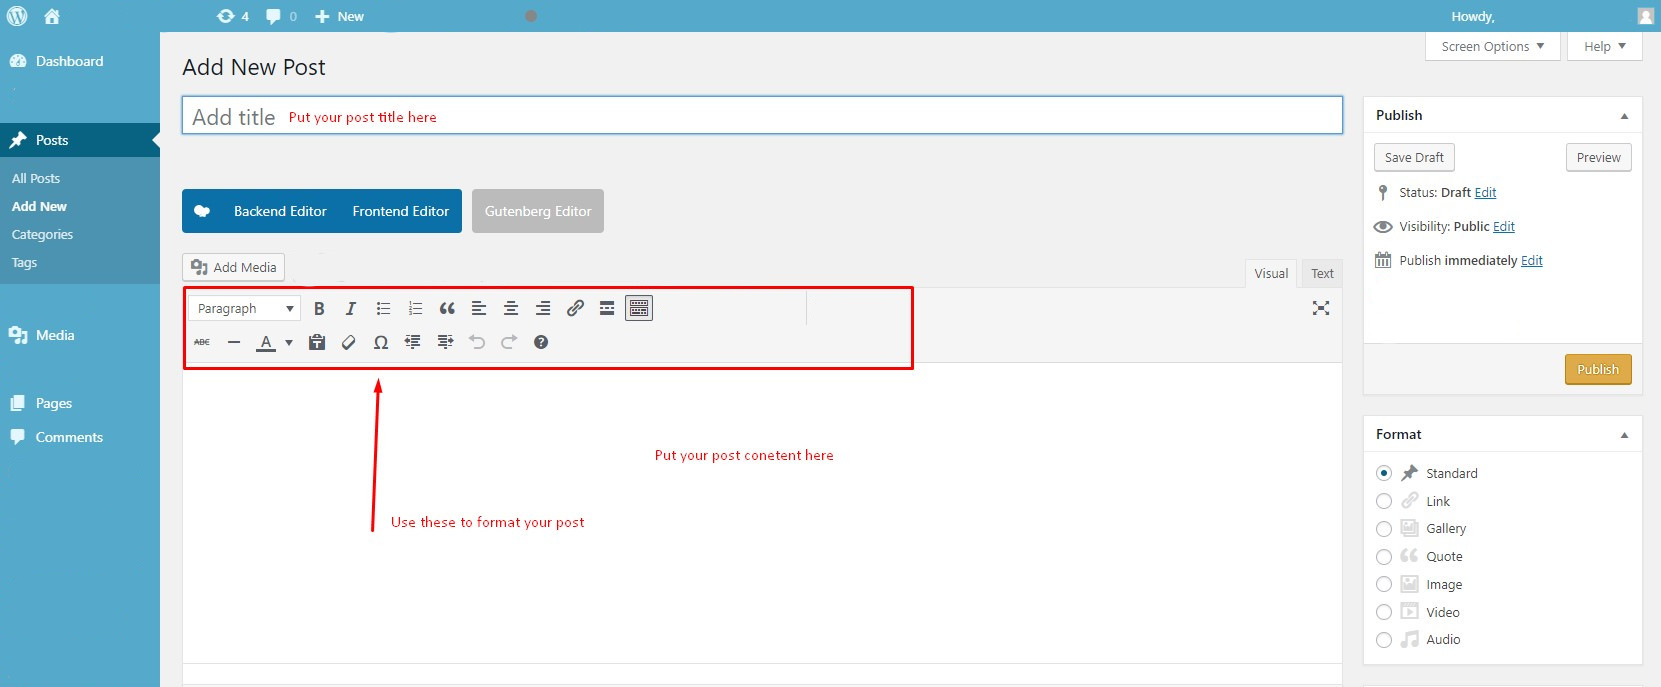
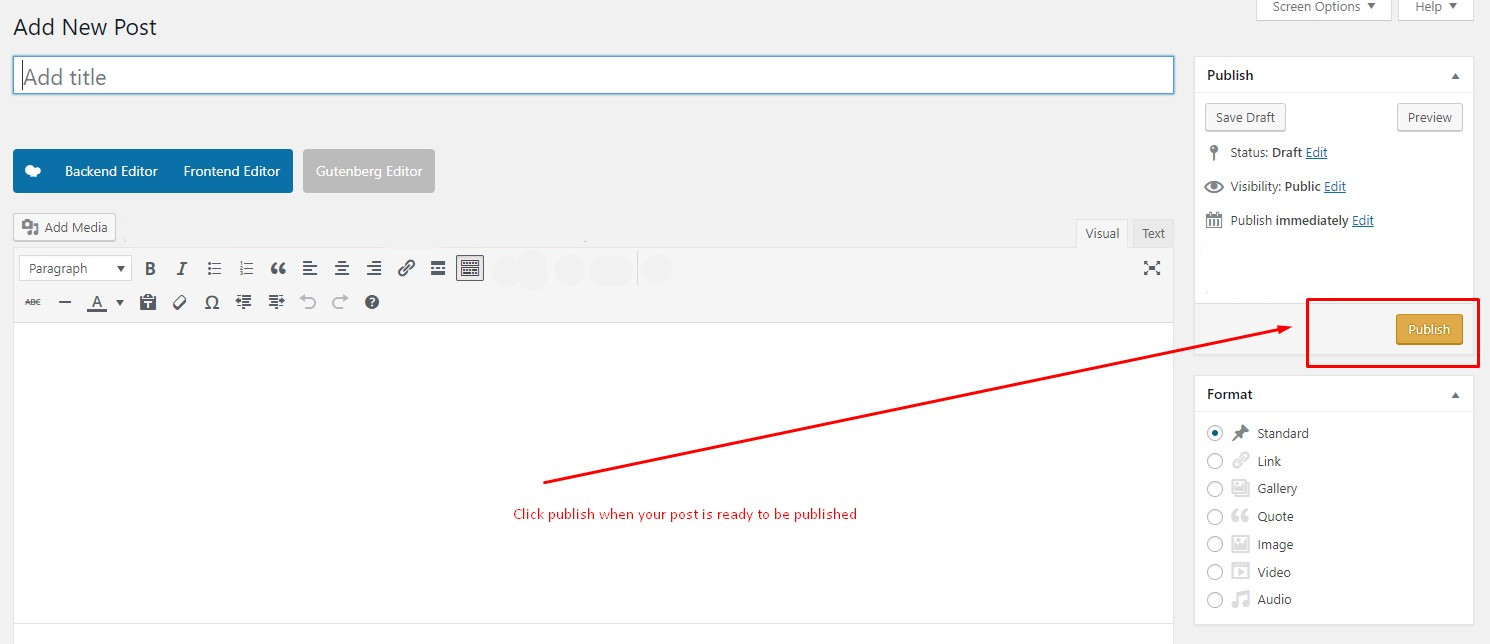
4- After clicking on “Add New”, now you’ll see the Add New Post page where you can create your first post.
The first box is where you’ll want to enter the title of your post.
Next is the Post formatting section or post editor. This is where you’ll actually type the content of your post.
4- Select your post’s category by checking the box
5- Add or Set Featured Image or Photo
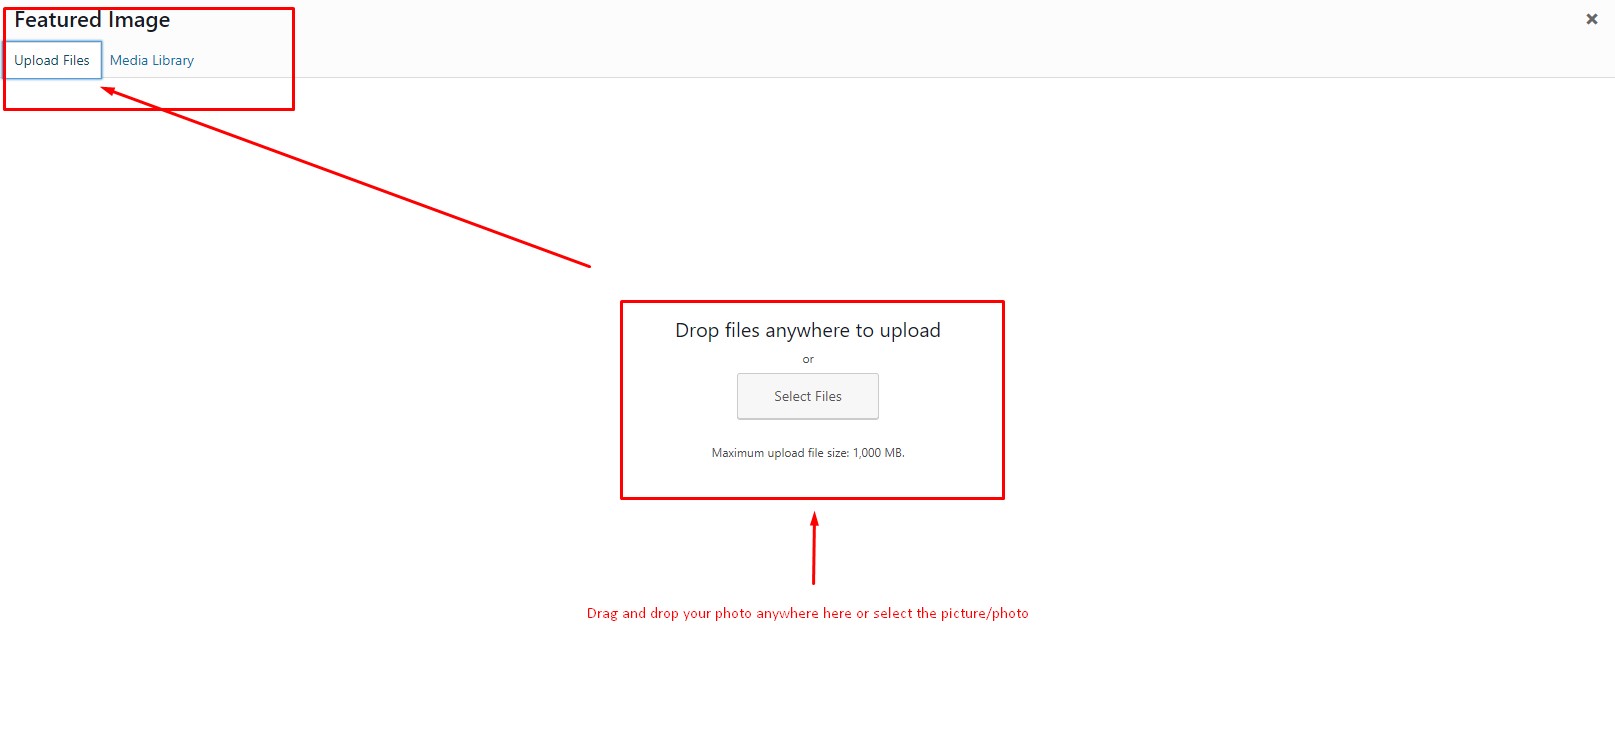
6- Select and upload your Featured Image or Photo
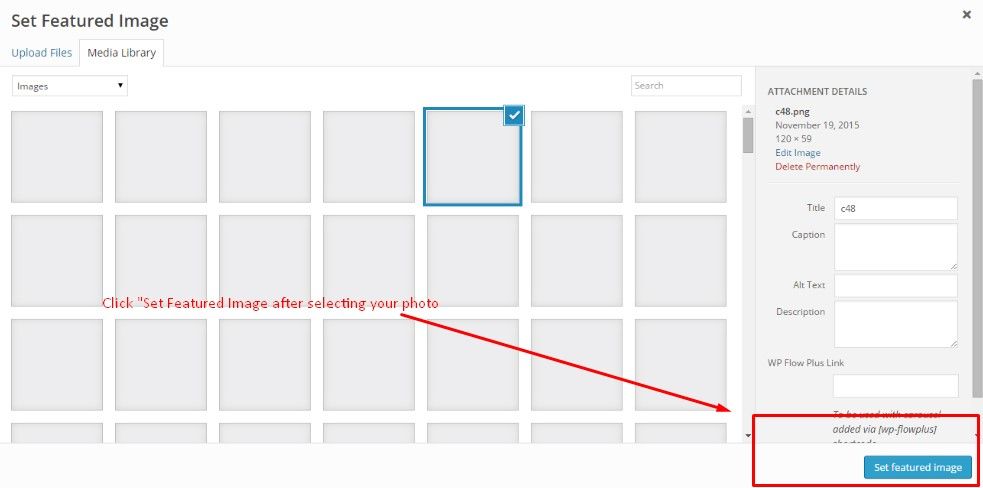
7- Set Your Post’s Featured Image or Photo
8- Once the Featured image or photo is Set, you can now publish your post


